
PuTTY is a free open source SSH client for Windows.
You can use PuTTY to connect to a remote UNIX or Linux server from your Windows machine.
Apart from SSH, it can also do telnet, serial, rlogin and RAW connection type. For example, using serial connection type you can connect to a networking device such as router or switch.
This tutorial is useful for beginners who are new to PuTTY and like to understand how to use them to connect to a remote server using SSH quick connect method, and save/load/delete sessions for repeated connections.
1. Download PuTTY
Download the putty.exe from here.
There is no installation. Just download the exe to any location on your Windows system (for example, on your desktop). You can even carry the exe on your USB drive for portable use.
2. Info Needed to Connect to Remote Server
Before you connect to a remote UNIX or Linux server, you need to have the following information. Mostly the system administrator will provide you with the following information.
- IP Address of the server: The ip-address can be external or internal. Sometimes instead of ip-address, you can also use FQDN. i.e a Fully qualified domain name for the corresponding server that you are trying to reach. (For example: 192.168.101.1 or dev.top5freeware.com)
- Username: This is the username you’ll use to login to the server (For example: ramesh)
- Password: This is password for the above username. (For example: mysecretpassword)
3. Quick Connect Using PuTTY
Click on the putty.exe to launch PuTTY. By default, it will display the following PuTTY configuration screen when you start it.
In quick connect mode, we’ll not be saving any session information, we’ll just connect to the remove server using an ip-address.
Enter the ip-address of the server in the “Hostname (or IP address)” field, and click on “Open” button at the bottom.
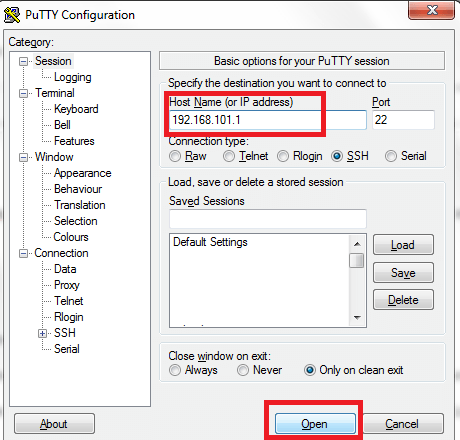
Note: By default, the connection type will be “SSH”. By default the port will be “22”, which is the default SSH port. Sometimes when the Linux system administrator asks you to SSH to a server on a different port, you should enter that particular port number in the “Port” field.
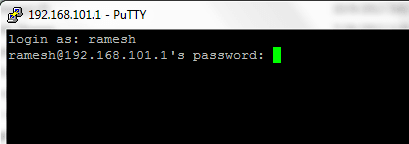
When you click on “Open”, it will connect to the given ip-address (or hostname), and then ask you to the username and password as shown below. Once you provide a valid credentials, you’ll be connected to the remote UNIX or Linux server successfully.
4. Save a PuTTY Session
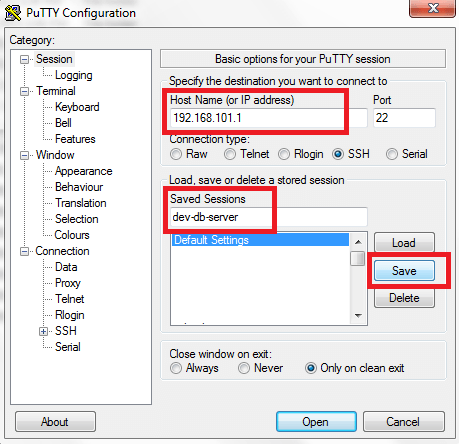
Instead of typing the ip-address (or hostname) everytime you connect to the remote server, you can save the information into a profile or session. Once you’ve saved it, you can just double click on it every time to connect to the remove server.
To save a PuTTY session, do the following:
- Enter the ip-address of the server in the “Hostname (or IP address)” field (For example: 192.168.101.1)
- Specify a name of the session in the “Saved Sessions” text field (For example: dev-db-server)
- Click on “Save” button
5. Launch a Saved PuTTY Session
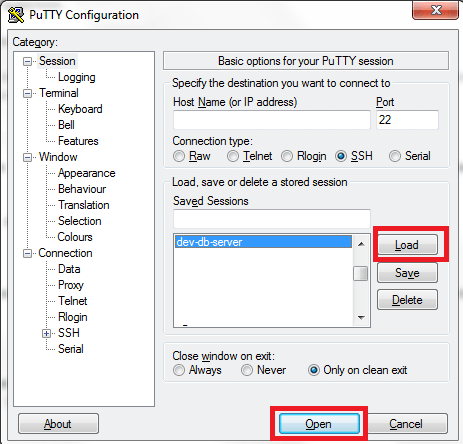
You can launch a saved PuTTY session by one of the following two methods:
- Just double click on the name of the session from the “Saved Sessions” list.
- Or, click on the name from the “Saved Sessions” list, and click on “Load”, and then click on “Open”.
You can add as many PuTTY sessions as you like to the list. To delete a sessions, select it from the list, and click on “Delete” button.

Comments on this entry are closed.