CamStudio is a video recording freeware. It can record the video and audio activity on your computer. The application has a user friendly interface and you can record AVI or SWF video of your computer screen. You can also convert AVI files to SWF files which are lean and bandwidth-friendly streaming flash videos. The application doesn’t include any help guide, so it may be a bit complicated for beginners to use the software. You can easily create demonstration videos for any software program or video tutorials. You can use this program in software marketing or if a technical error occurs, you may record it and get the problem solved from tech support. Latest version of CamStudio supports Windows 7 and here is the review for the same.
- Rating:

- Download CamStudio
- Home Page
- OS: 32 bit and 64 bit Windows 7, Windows XP, Windows Vista
What is new in this Version?
- Major problem of memory leak has been fixed in this version which use to cause crash in CamStudio after a 40-50 minutes of recording.
- Some small issues are also fixed and region calculation routines have been redesigned for better work.
- The procedure for sizing all the calculations is same now and area you define in regions will be recorded finely without any shift in position or loosing rows or columns.
- Size of region and recording are displayed correctly.
- Problem of how CamStudio treated ‘TimeDelayInMilliSecs’ is fixed. A positive value now ,means that time is added instead of subtracted.
1. Select The Region Of Screen That Needs To Be Recorded
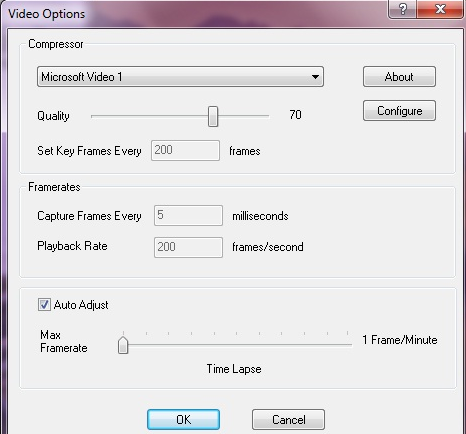
CamStudio records video activity and sound into standard AVI video files for Windows 7. For small streamable video files with less compression, it has an option to record directly to flash SWF. Otherwise, it converts AVI files into SWF files with the help of SWF producer. You have different options of selecting the region that you want to record, you can record full screen or the specific part of the screen. If you select Fixed Region, you can set its height and width and its vertical and horizontal positioning but if region is not fixed, then you can’t pre-define such settings. You can anytime stop recording or pause it and then resume it from the same.
2. Audio Can Be Recorded And Added Separately
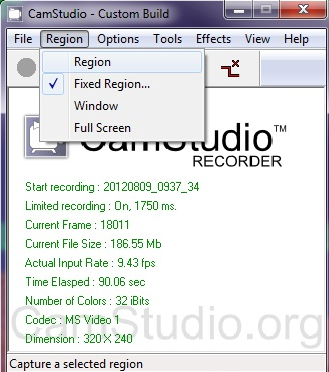
This is one very good feature of CamStudio that you can record the audio from your system speaker or microphone and add it later on separately. Audio recording options are available as shown in the picture below and you can select out of that. Either you can select to record audio from microphone or from speakers. Configuration options are available for both of them. If you don’t want to record any audio select the other option of ‘Do not record audio’. Remember when you are recording using any of the options, remove the tick mark from ‘Do not record audio’, otherwise you may end up recording a mute movie.
3. Screen Annotations And Effects
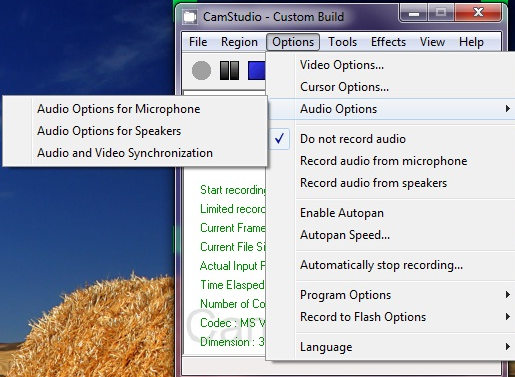
CamStudio gives you a great option to add effects and screen annotations to your video in order to enhance your video and bring attention to the different areas of screen where you want to focus. You can add System Time Stamp, Xnote Time Stamp, captions and watermark. From screen shots below, you can take an idea that how to use these options and add memos, arrows, speech balloons etc. to a screen cast. This way you can create more effective and interesting videos. You can always add more effects to your video but you can’t edit your videos with Camstudio like cutting and joining etc.
4. Cursor Options And Highlighting
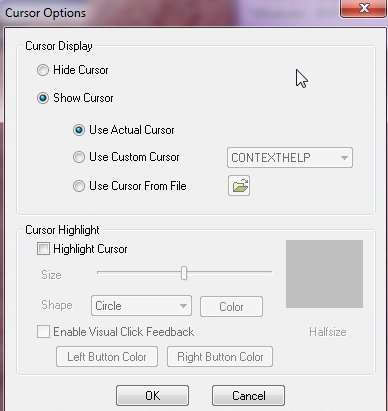
CamStudio is embedded with wonderful cursor options as it gets difficult to see mouse cursor while creating screen casts. You can check the screen shot for the cursor options. It clearly shows that you can hide or highlight the cursor. You can use actual or even costumed cursor. You can even select the size and shape of cursor.
5. Video Options
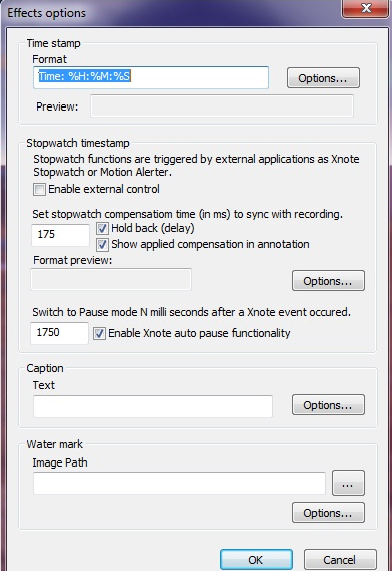
Video options allow you to enhance quality of video, control compression, work on time lapse and frame rates etc. You can easily set a video according to your requirements. You can set quality, key frames and capture frames, playback rate and much more. A screen shot below will help in understanding how to make changes through video options.
